There are many ways that you can convert your color picture to black & white. One of the most common ways to convert it is to change the color mode to grayscale under the image menu. This tends to leave your picture fairly bland though.
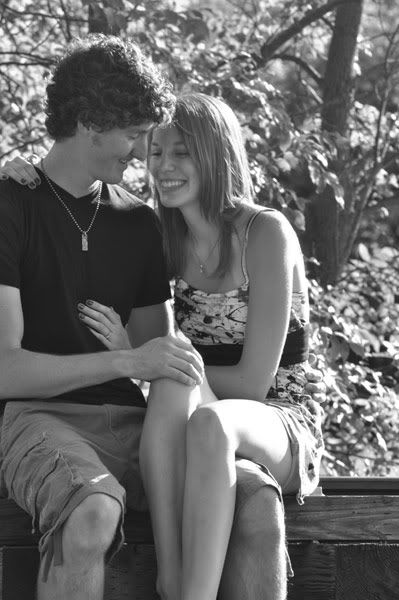
Today I’m going to show you a way to convert your picture without losing the contrast and making you picture look flat. (The screenshots and directions are in Photoshop Elements 5.0.)
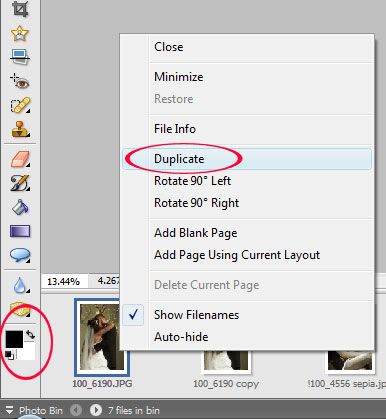
First open up the picture that you want to convert to black & white. Duplicate the picture by right clicking on the thumbnail in the Photo Bin and selecting Duplicate. This is so you are not working on the original and accidently save over top of it. Press D to set your foreground and background to the default black and white. Make sure that the black is in the top box. If it isn’t press X to switch them.
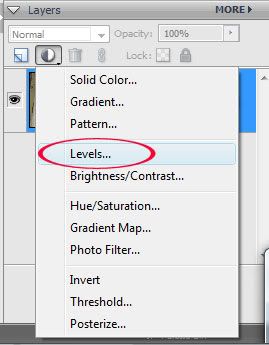
Now go to the top of the Layers Palette and choose Levels from the Adjustment Layers menu. When the box pops up don’t change anything on it right now, just click ok. This will add a layer to your Layers palette named Levels 1.
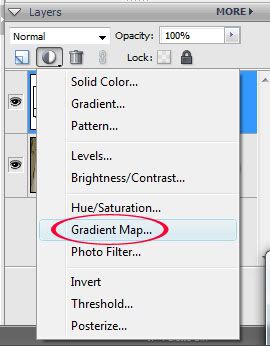
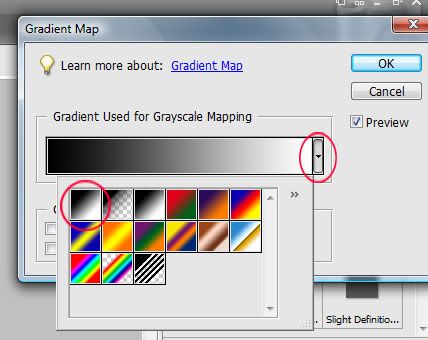
Go back to the Layers Adjustment menu and this time chose Gradient Map. Check to make sure the Gradient map is set on black to white. If it is not click on the arrow next to the gradient map and choose the correct gradient from the popup menu. Click ok. This will give you a layer in the Layers Palette named Gradient Map 1. Just going this far will already give you a better black & white picture, but we are not done yet.
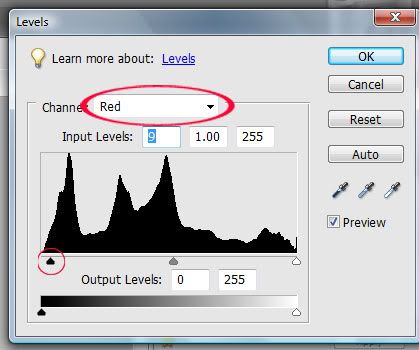
In the Layers palette, double-click on the Levels thumbnail in the Levels 1 layer. This will popup the Levels box. From here we are going to edit the individual colors, starting with red. So go ahead and choose the Red channel from the drop down menu. Grab the black (shadow) arrow under the Input Levels and slide it right. This will increase the shadows in the red channel.
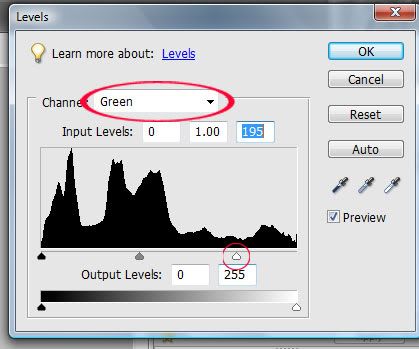
When you think you are satisfied with this edit, go back up to the drop down menu and choose the Green channel. On this one we are going to slide the white (highlights) arrow to the left.
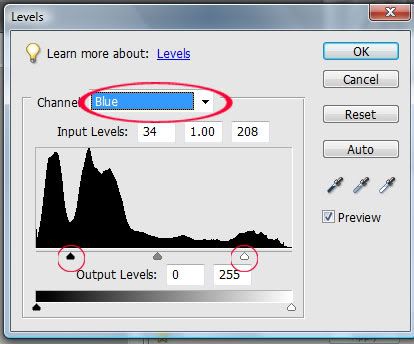
Again when you are satisfied with this edit, go back up to the drop down menu. This time we are going to work in the Blue channel. Go ahead and move the highlights arrow to the quite a bit to the left. Move the shadows arrow just a little bit to the right. Not every picture you convert will have the same settings, play around with the sliders a bit until you get the effect you are looking for. When you are happy with how your picture looks go ahead and click OK.
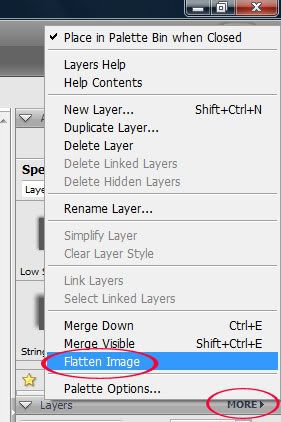
One last step and then we are done. Go to the Layers palette, click on More. From that menu choose Flatten Image. This will flatten the adjustment layers into your picture.
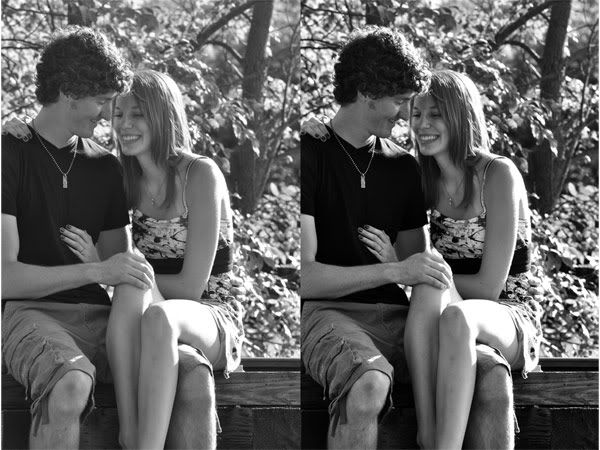
Check out the pictures side by side. The one on the left I just used the grayscale mode to convert the picture. Look how much of a difference there is in the one on the right.
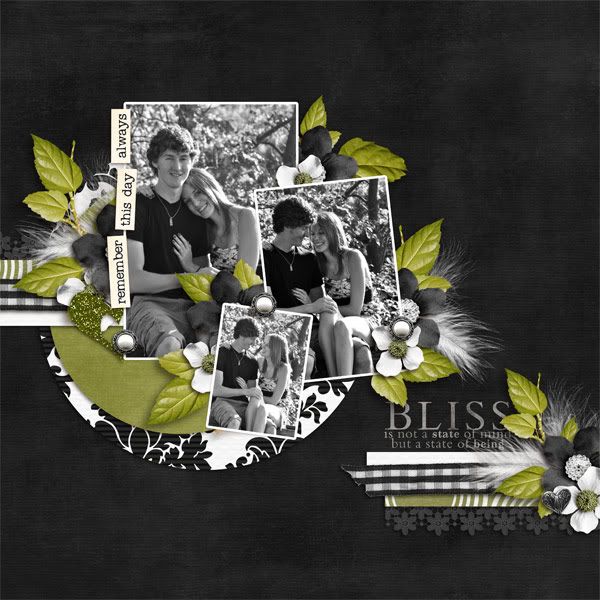
Here is my page with my new black & white picture using LDrag's Blessings of Life and Stolen Moments & Rosy Posy's Here and Now.

No comments:
Post a Comment